

These Pencil Treat Bags are a fun little back-to-school surprise that comes together in just a few minutes. They look like oversized pencils, but they’re actually filled with sweet treats and snacks that kids will be excited to receive.
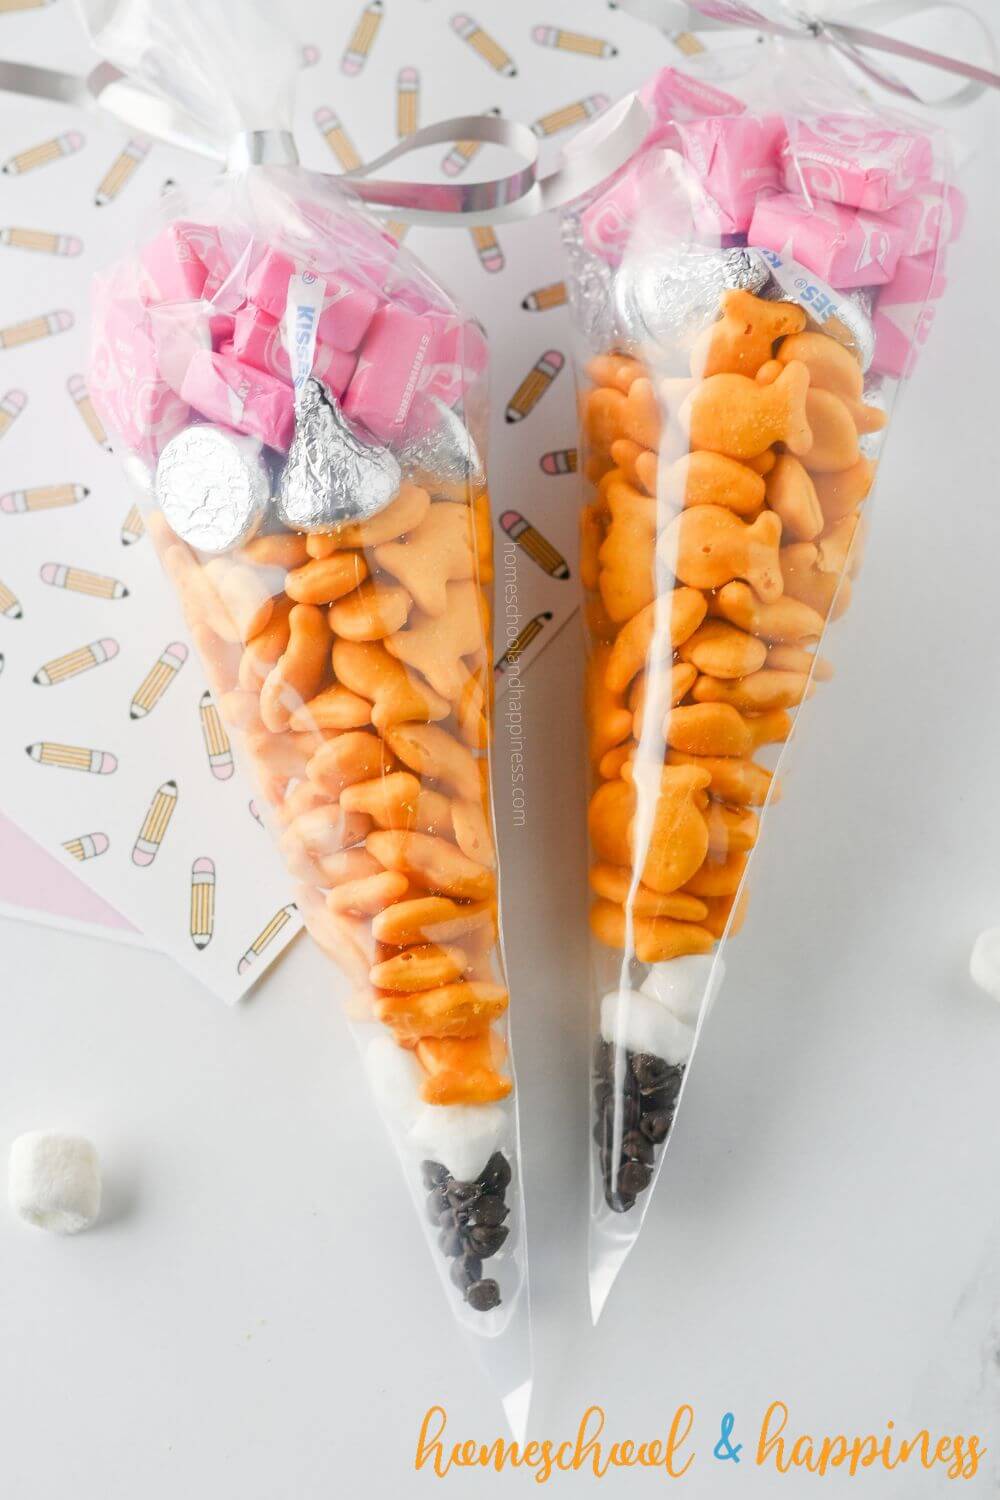
Whether you’re putting together a first-day-of-school gift, making treats for a classroom party, or adding something special to a homeschool morning, these pencil treat bags are simple to make and easy to customize. The combination of goldfish crackers, chocolate chips, marshmallows, and candy creates the perfect pencil shape while keeping the project fun and hands-on.
Why You’ll Love These Back To School Treat Bags
- Easy to assemble with no baking required.
- Comes together in about 10 minutes.
- A fun back-to-school activity for kids and parents.
- Uses a mix of snacks and sweets for the pencil shape look.
- Makes a cute gift for classmates, teachers, or homeschool friends.
Crafting + Learning = Fun!
As kids help put together these pencil treat bags, they’re doing much more than filling bags with snacks. Along the way, they can naturally practice:
- Counting candies and crackers
- Sorting ingredients by color and shape
- Following step-by-step directions
- Using fine motor skills to fill the bags
- Measuring and estimating amounts
- Recognizing patterns in the pencil design
- Practicing patience and focus
- Expressing creativity with ribbons and gift tags
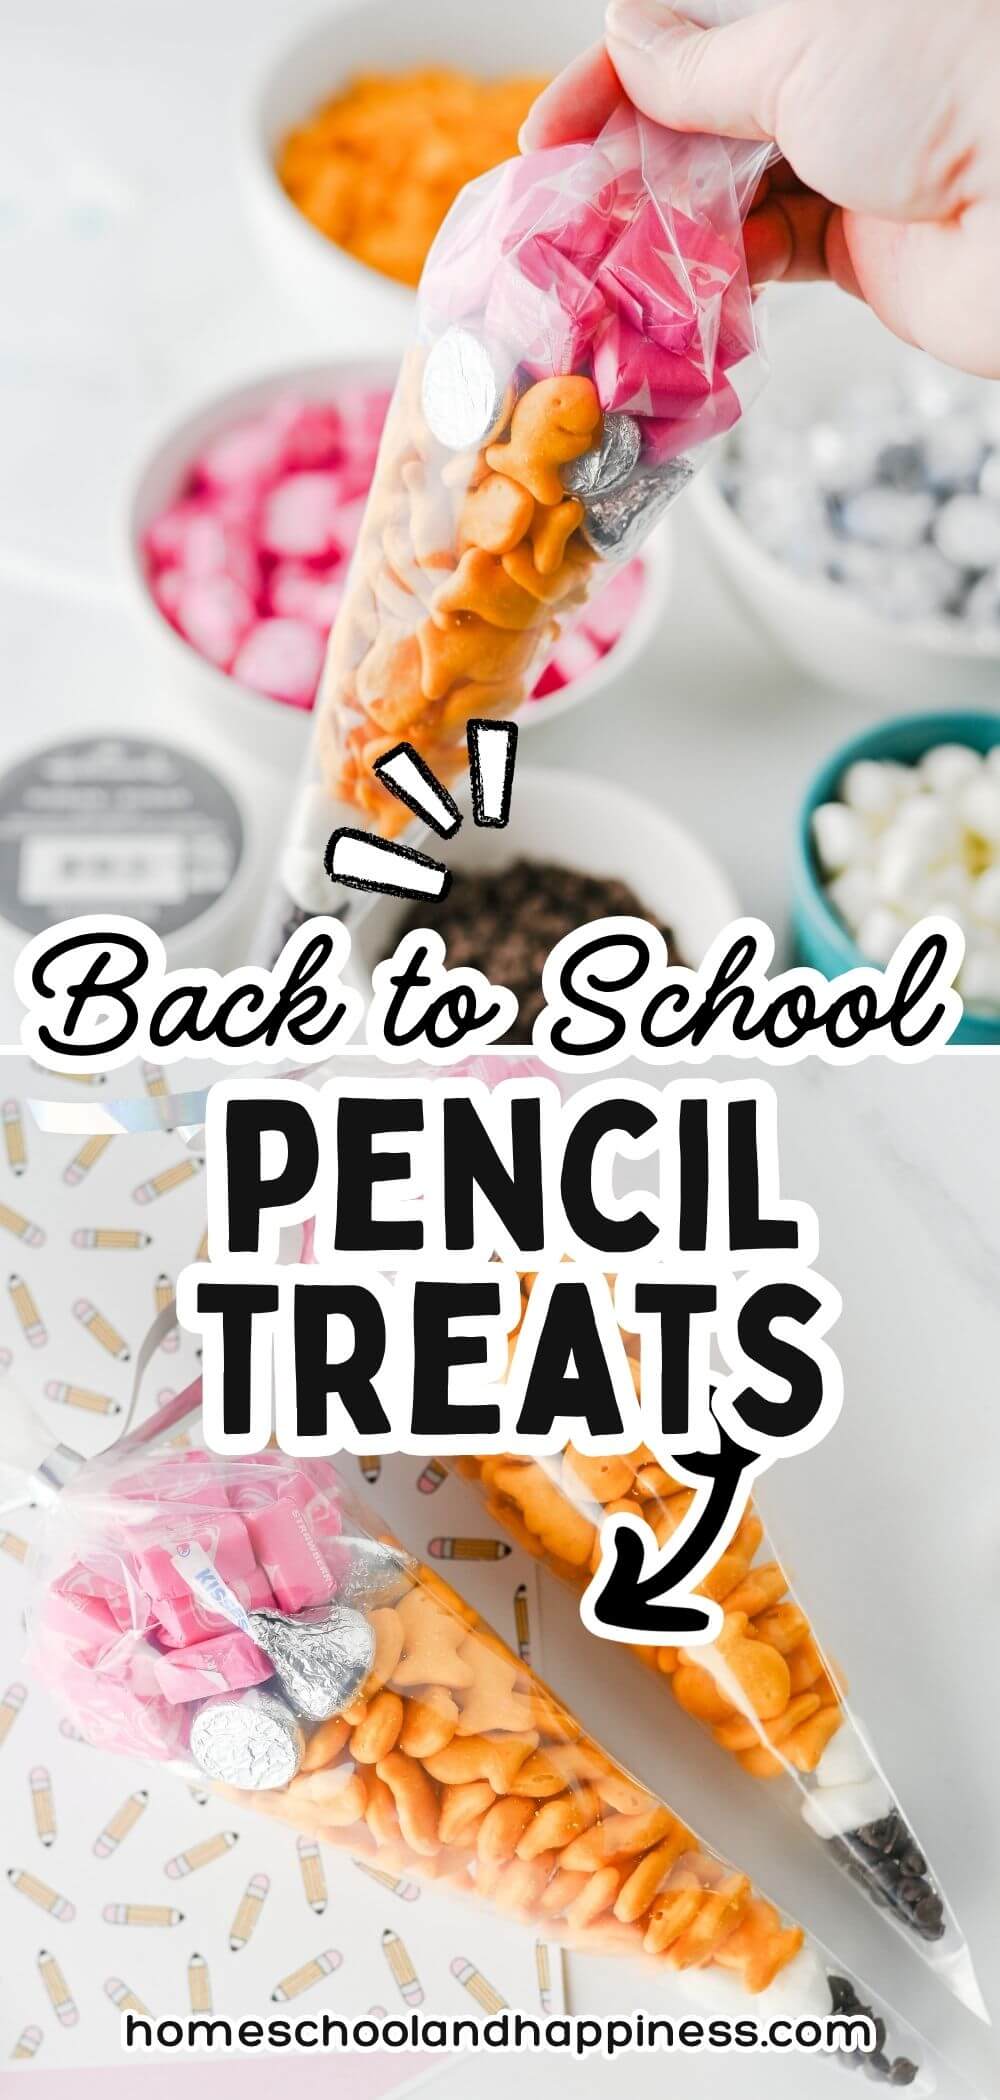
Supplies
- Miniature chocolate chips; create the pencil tip.
- Miniature marshmallows; form the pencil wood section.
- Goldfish crackers; make up the pencil body.
- Pink Starburst candies; create the eraser.
- Hershey Kisses; add the silver ferrule section.
- 12-inch piping bags; hold all the ingredients.
- Ribbon or string; used to secure the bags.
How to Make Pencil Treat Bags
Step 1: Add 1 to 2 teaspoons of miniature chocolate chips to the pointed end of a piping bag.
Step 2: Place 2 to 3 miniature marshmallows on top of the chocolate chips.
Step 3: Add about 1½ cups of goldfish crackers to create the pencil body.
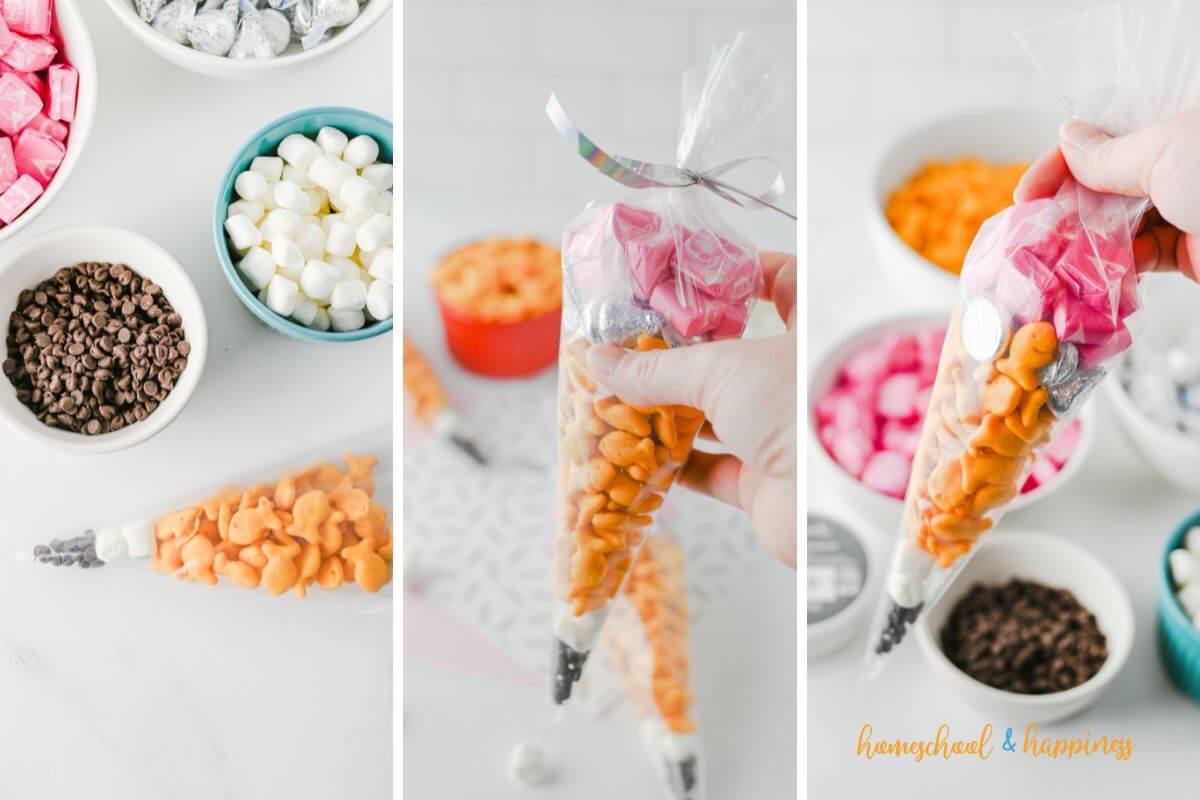
Step 4: Add enough Hershey Kisses to form a silver layer above the goldfish crackers.
Step 5: Add pink Starburst candies on top to create the pencil eraser.
Step 6: Tie the top of the bag securely with ribbon or string.
Step 7: Repeat with the remaining piping bags until all five pencil treat bags are assembled
Substitutions & Variations
- Use colorful ribbon that matches your school colors.
- Add a personalized gift tag with each child’s name.
- Swap the ribbon for twine for a different look.
- Attach a pencil or note card to the finished bag.
- Add a few extra candies at the top for a fuller eraser section.
- Swap out any snacks or sweet treats you prefer.
When to Use Pencil Treat Bags
These work well for first-day-of-school celebrations, classroom parties, meet-the-teacher events, homeschool co-op gatherings, or welcome-back gifts. They’re also a fun addition to a lunchbox surprise during the first week of school.
Storage
- Store at room temperature until ready to serve.
- Keep the bags sealed to help maintain freshness.
- Best enjoyed within a few days of assembly.
- Avoid storing in direct sunlight or warm areas.
FAQs
What size piping bags work best?
Twelve-inch piping bags create the pencil shape and hold the ingredients comfortably.
Can I use different snacks?
Yes. Similar-sized snacks and candies can be substituted while keeping the layered pencil design.
How many pencil treat bags does this make?
This recipe makes 5 pencil treat bags.
Looking for more back to school fun?
- Construction Paper Bus Craft for Preschool
- Back To School Crafts for Homeschool Students
- Bento Box Recipes for Adults
- This Lil Piggy Yogurt Snack for Kids
Easy Pencil Treat Bags
Ingredients
- 1/4 cup miniature chocolate chips
- 1/2 cup miniature marshmallows
- 6 cups goldfish crackers
- 15.6 ounce bag pink Starburst candies
- 9.5 ounce bag Hershey Kisses
- 5 (12 inch) piping bags
- Ribbon or string
Instructions
- Add a teaspoon or two of miniature chocolate chips to the pointed end of a piping bag.
- Place 2 to 3 miniature marshmallows on top.
- Add about 1½ cups of goldfish crackers.
- Layer Hershey Kisses above the crackers.
- Add Starburst candies to create the eraser section.
- Tie the bag closed with ribbon or string.
- Repeat with the remaining bags.
Notes
- Clear piping bags help show the pencil design.
- Tie the bags tightly to keep the layers in place.
- Great for classroom treats or homeschool celebrations.
- Add a gift tag for an extra special touch.


